
Introduction
Welcome to the DistroTV Studio User Guide.
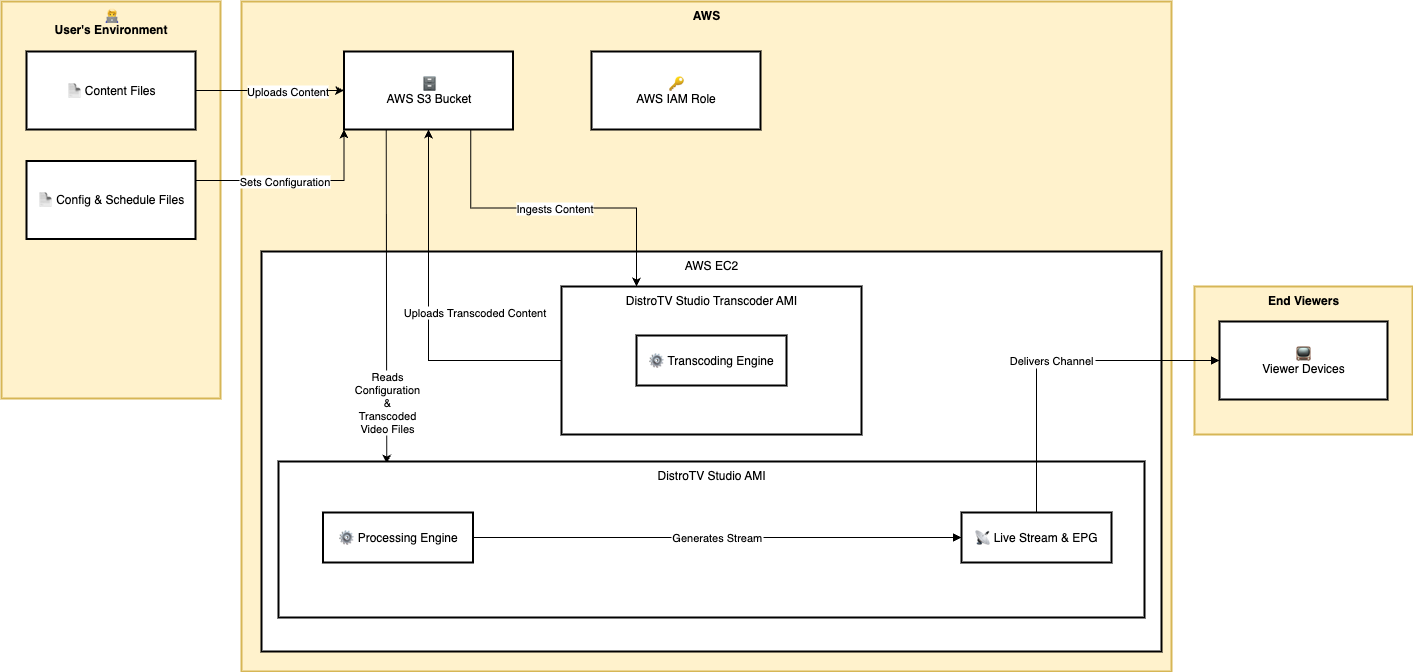
DistroTV Studio allows you to build a full-suite linear streaming HLS channel equipped with ad markers and accompanying EPG.
The purpose of this document is to provide an in-depth look on different configurations available within the DistroTV Studio AMI to customize your FAST channel with your needs.
In this guide, you will learn how to:
-
Correctly configure the necessary AWS services, including an S3 Bucket, IAM permissions, and Security Groups.
-
Launch and initialize the DistroTV Studio and DistroTV Studio Transcoder EC2 instances from AWS Marketplace AMIs.
-
Ingest your own video metadata and set up your channel schedule.
-
Launch and verify that your first channel is live and streaming.
-
By the end of this guide, you will have your own personal functional FAST channel with ad break markers and the foundational knowledge to customize your channel as needed with the advanced configurations.
Here is a System Architecture Diagram of what you will setup by the end of this guide.
Prerequisites
Before you begin, you should have:
-
An active AWS account with permissions to create S3 buckets, IAM roles and policies, and EC2 instances.
-
Basic familiarity with navigating the AWS Management Console.
-
Familiarity with the DistroTV Studio Getting Started Guide: Built from MP4
Setting Up the AWS Environment
Creating an S3 Bucket
-
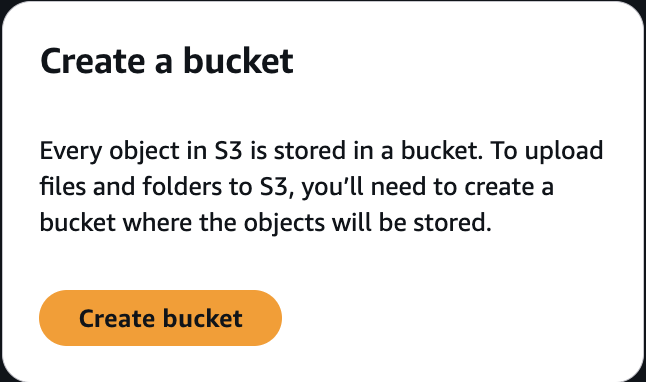
Open AWS console and navigate to S3 service
-
Click “Create a bucket” button
-
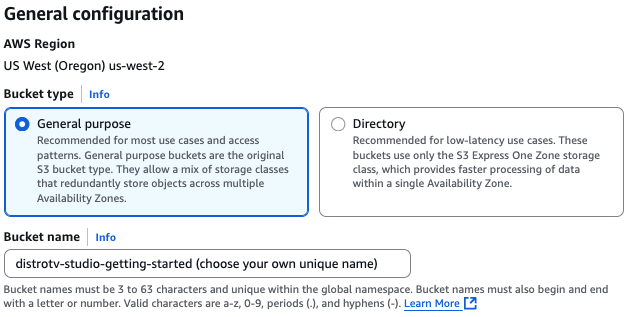
Apply the following settings:(if an option is not mentioned, keep it on the default value)
-
Bucket type: “General purpose”
-
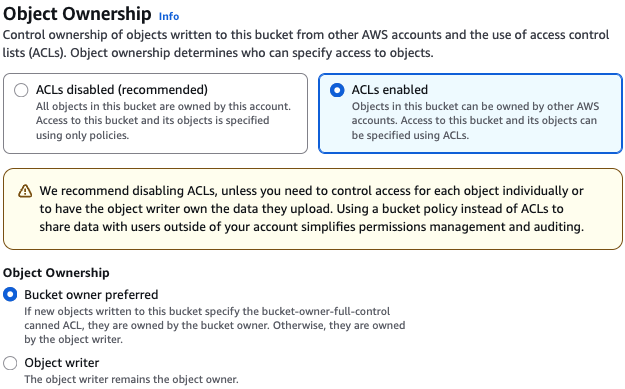
Object Ownership: “ACLs enabled”
-
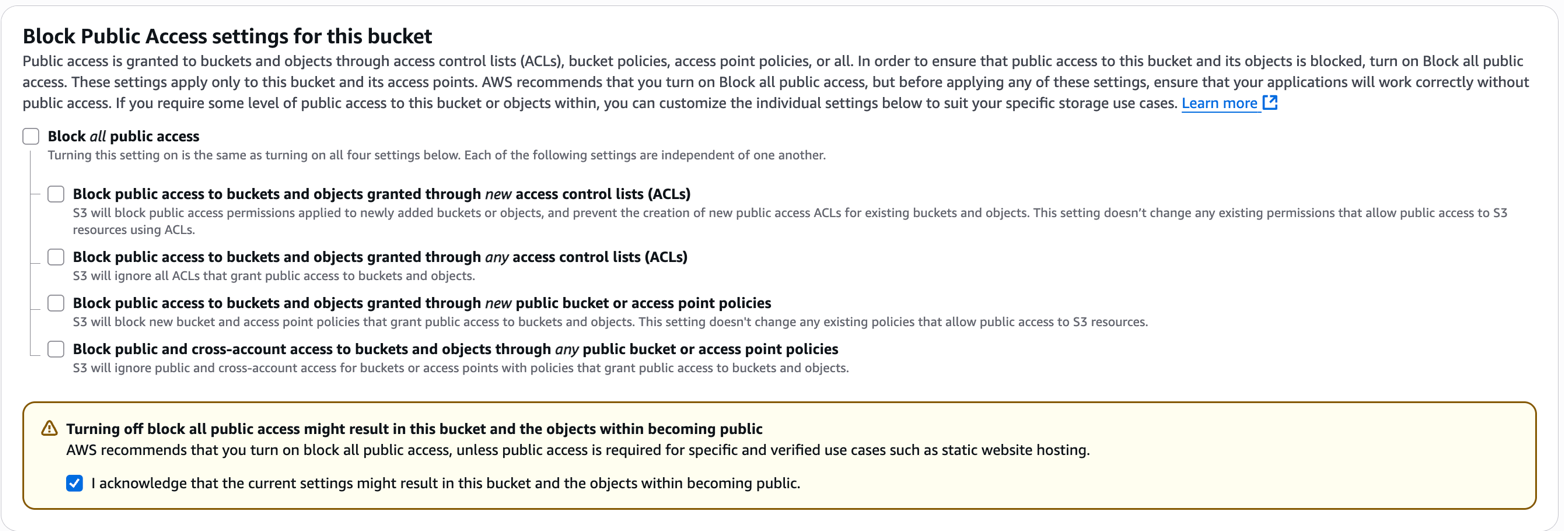
Uncheck “Block all public access”
-
Check “I acknowledge that the current settings might result in this bucket and the objects within becoming public.”
-
-
-
Click “Create Bucket” button
-
Note the name of your bucket as you will be using this in later steps.
Edit Bucket Permissions
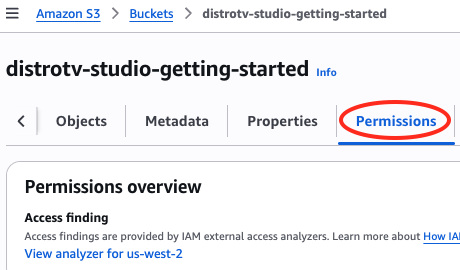
Navigate to the S3 bucket you just created
-
Select the “Permissions” tab to configure its access settings.
-
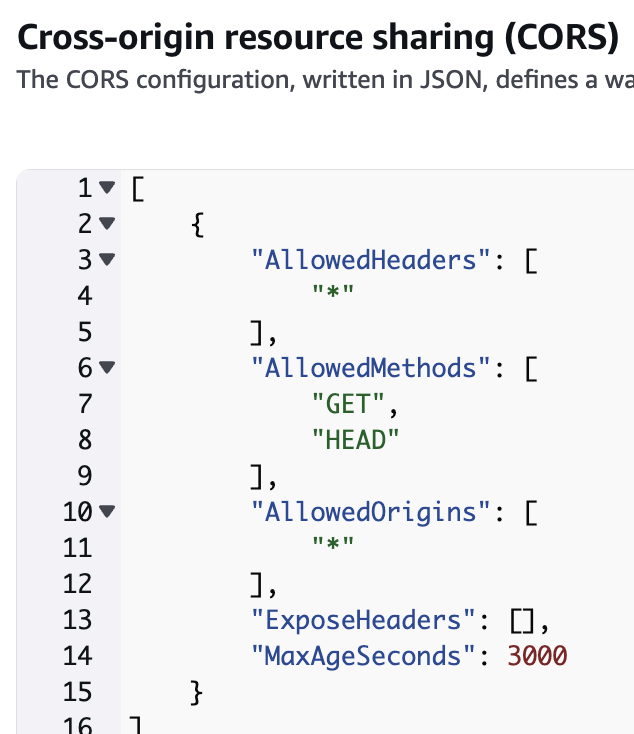
In the “Permissions” tab, scroll down to “Cross-origin resource sharing (CORS)”
-
Select “Edit” in the top right of the CORS box
Paste the following into the text box
-
Click “Save changes” button
-
Consider leaving this AWS S3 tab open in your browser as you will need to reference your bucket name in the following steps

Access Management Setup
Create a New IAM Policy
-
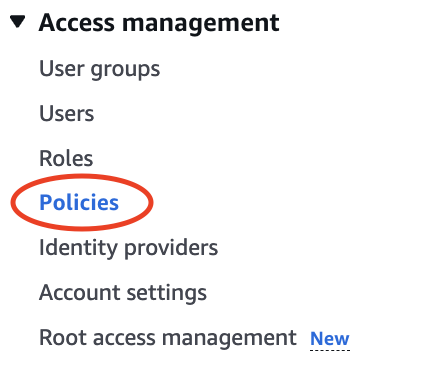
Open AWS console and navigate to IAM service
-
Navigate to “Policies” menu item under the “Access management” on the left menu
-
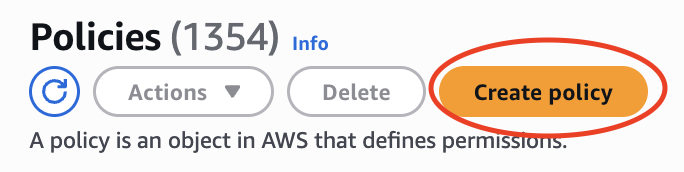
Click on “Create policy”
-
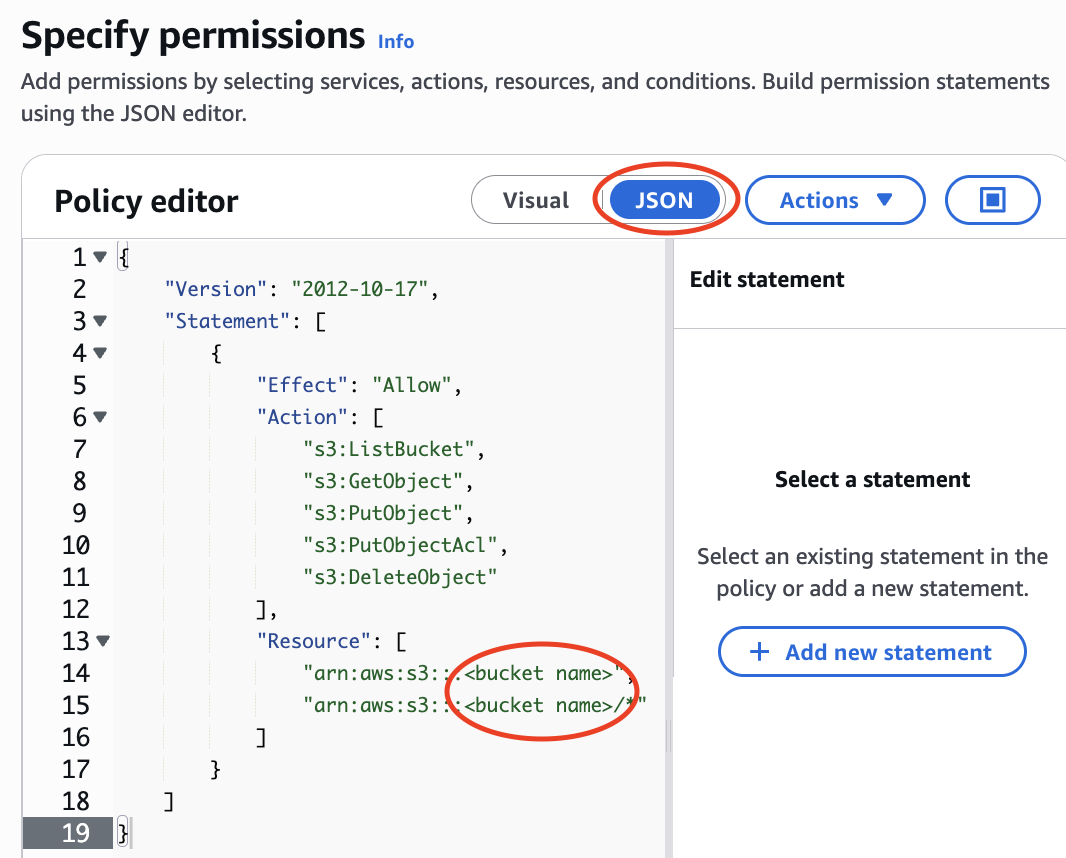
In the “Policy selector”, select the “JSON” tab
-
Edit statement and paste the following JSON, ensuring you replace the bucket name with the actual name of the S3 bucket you created in Chapter 2
-
Save by clicking the “Next” button
-
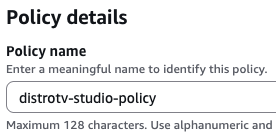
Name this “distrotv-studio-policy”, or another name of your choice, then click “Create policy” button
Create a New Role
-
Open AWS console and navigate to IAM service
-
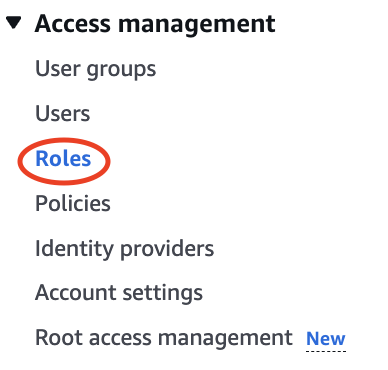
Navigate to “Roles” menu item under the Access management on the left menu
-
Click on “Create role” button

-
For “Trusted entity type”, ensure “AWS service” is selected
-
Under “Use case”, select the “EC2” radio button option

Click on “Next” button
-
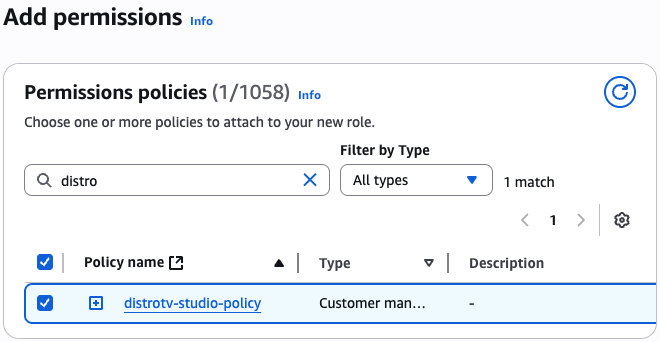
Add permissions: In the “Permissions policies” search box, search for the policy you created in Step 1 (e.g., distrotv-studio-policy or the name you chose). Check the box next to this policy to select it.
-
Name, review, and create
-
Under “Role name” box “Name” section, enter ‘distrotv-studio-role’ or another name of your choice
-
Description can also be left default or changed to your liking.
-

-
Click on “Create role” button
Create a Global Conf File
The global conf file is a configuration file which helps point the DistroTV Studio AMI to access the correct public S3 directories for files.
It takes 4 required parameters:
s3_meta is the folder where the channel configuration files are being placed.
s3_output is the folder where the m3u8s and ts files will be uploaded. they will be uploaded into this folder /strm/ for linear and built channels and in /vid/ for content generated by the DistroTV Studio Transcoder.
s3_transcode is the folder where the preramp will communicate with the DistroTV Studio Transcoder when new videos are to be encoded.
channel_list are the names of the configuration files the DistroTV Studio AMI will scan for within your S3 directory. In this guide we assume the names of the channel files will be yourchannelname_preramp and yourchannelname.
Create Global Conf File
-
Download the sample global conf file here and be sure to replace the bucket name with your bucket, and yourchannelname with the channel name of your choice:
https://docs.distro.tv/samples/channel-builder/globals/global_1.conf
-
HINT: After opening the link, right-click the page and ‘Save As’ global_1.conf
-
Edit the file and be sure to replace the bucket name with your bucket and yourchannelname with the channel name of your choosing
-
Note: the /meta/ and /transcode/ folders will be created in later steps
-
-
Save the file as “global_1.conf” on your local machine. You will be uploading this file in a later step.
Create globals Folder
-
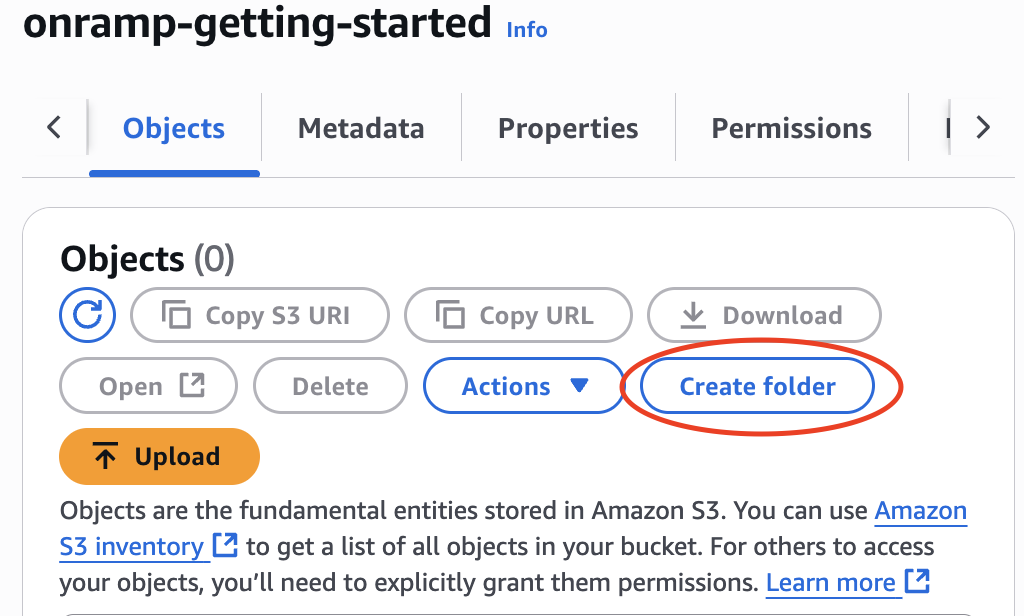
Open AWS console and navigate to S3 service and navigate to the bucket you created in Chapter 1 (root folder)
-
Click on “Create folder” button
-
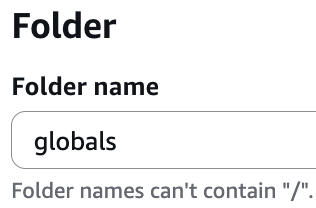
Under “Folder” box “Folder name” section, name this “globals”
-
Create a globals folder inside the path defined in the s3_output folder.
-
If you kept the default filepath from the sample global conf file, the file directory path would be
s3://bucket name/globals/
-
Upload Your Global Conf File
-
Upload the global conf file you just created to your S3 bucket /globals/ folder.
Creating S3 Bucket Directories
-
In your S3 bucket, ensure that the folders & directories listed in your global conf file exist
-
s3_meta=s3://bucket name/meta/
-
s3_output=s3://bucket name/
-
s3_transcode=s3://bucket name/transcode/
-
If they do not exist, create them and name them according to how you defined the paths in your global conf file by following the steps below
-
Create meta Folder
Navigate to your S3 bucket root folder
-
Click on “Create folder” button
-
Under “Folder” box “Folder name” section, name this “meta”
-
If you kept the default filepath from the sample global conf file, the file directory path would be
s3://bucket name/meta
-
-
Click on “Create folder” button
Create transcode Folder
Navigate to your S3 bucket root folder
-
Click on “Create folder” button
-
Under “Folder” box “Folder name” section, name this “transcode”
-
If you kept the default filepath from the sample global conf file, the file directory path would be
s3://bucket name/transcode
-
-
Click on “Create folder” button
Create content Folder
Navigate to your S3 bucket root folder
-
Click on “Create folder” button
-
Under “Folder” box “Folder name” section, name this “content”
-
If you kept the default filepath from the sample global conf file, the file directory path would be
s3://bucket name/content/
-
-
Click on “Create folder” button
Create channels Folder
-
Navigate to your S3 bucket meta folder
-
Click on “Create folder” button
-
Under “Folder” box “Folder name” section, name this “channels”
-
If you kept the default filepath from the sample global conf file, the file directory path would be
s3://bucket name/meta/channels/
-
-
Click on “Create folder” button
Create schedule Folder
-
Navigate to your S3 bucket meta folder
-
Click on “Create folder” button
-
Under “Folder” box “Folder name” section, name this “schedule”
-
If you kept the default filepath from the sample global conf file, the file directory path would be
s3://bucket name/meta/schedule/
-
-
Click on “Create folder” button
After this chapter, your S3 bucket should have the following structure:
Launch a DistroTV Studio Image
-
Navigate to AWS EC2 service
-
Navigate to “AMI Catalog” menu item under the “Images” section on the left menu
-
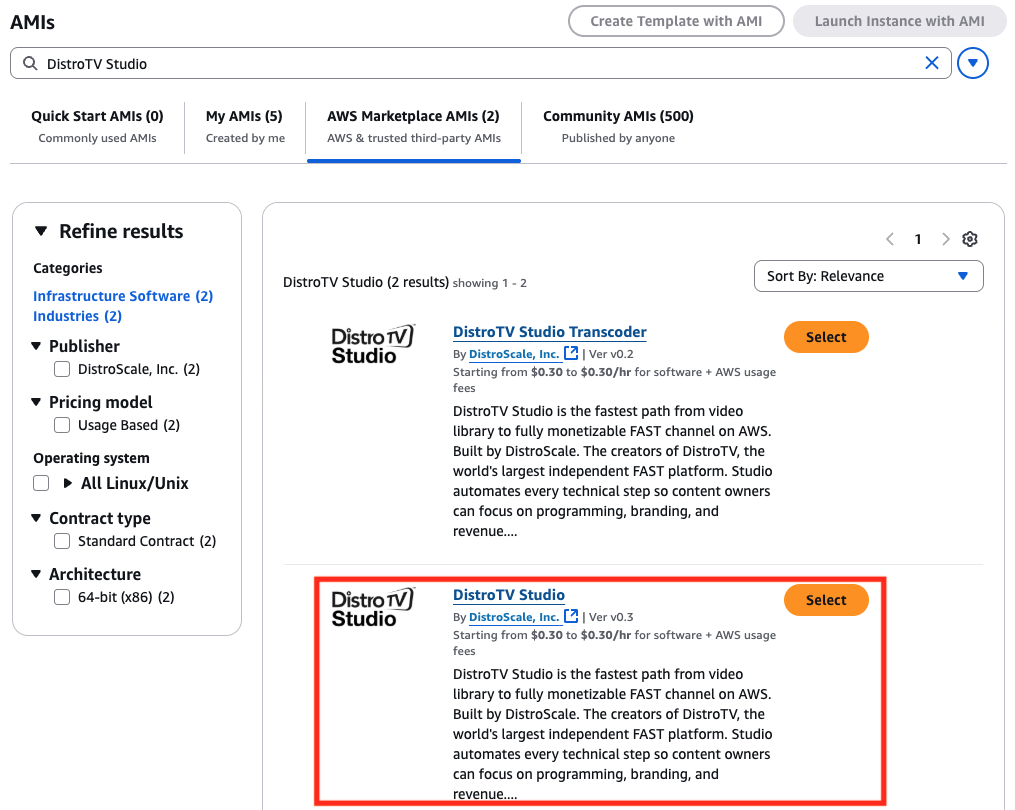
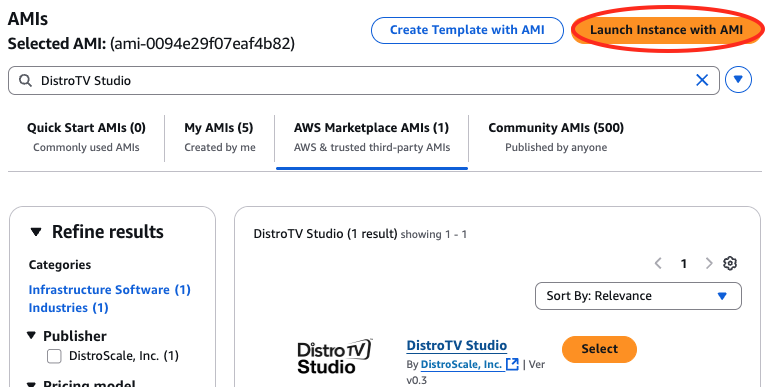
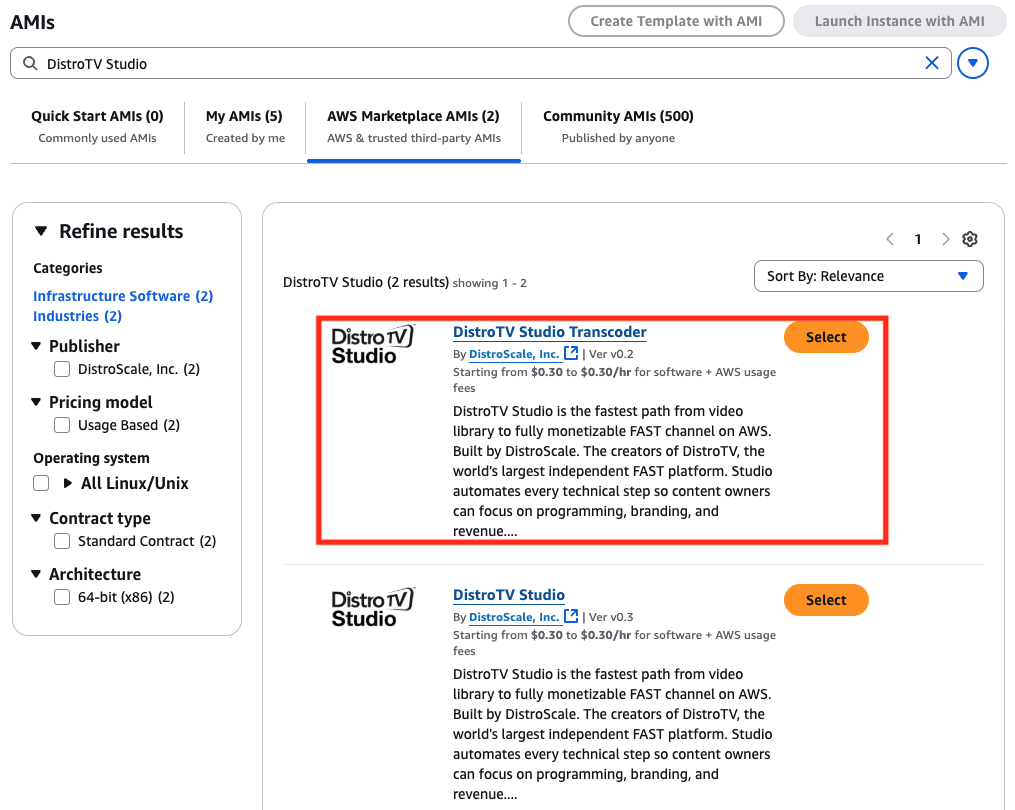
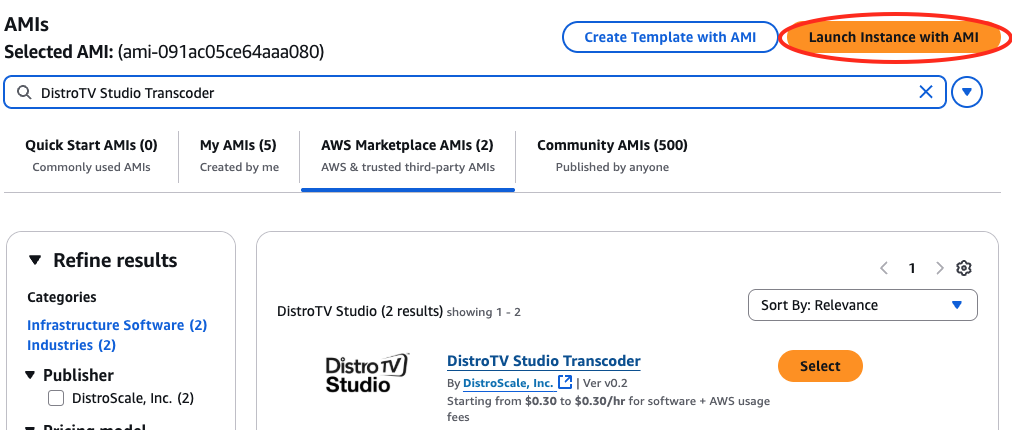
Navigate to “AWS Marketplace AMIs” and search for “DistroTV Studio”
-
Select the DistroTV Studio image and click on “Subscribe now”
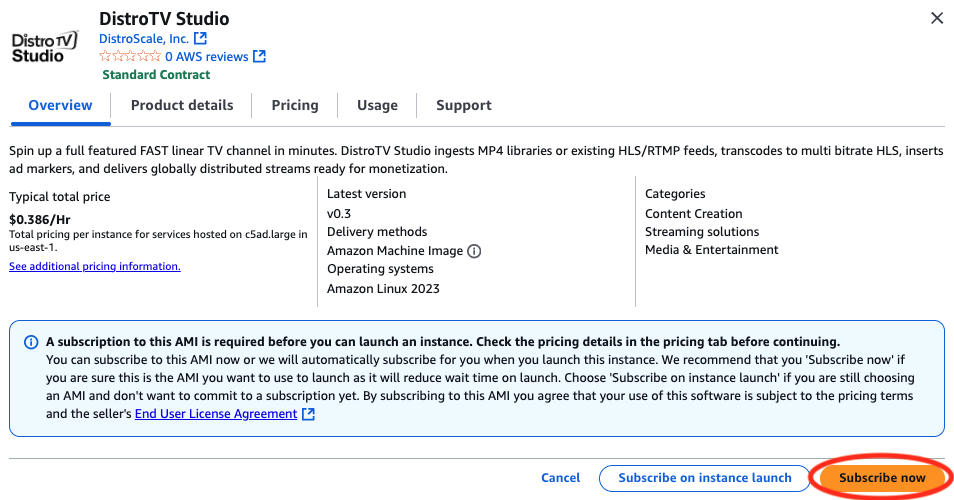
-
After subscribing, you click on “Launch Instance with AMI”
Name – to your liking
-
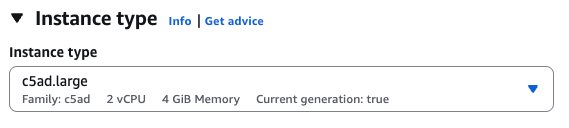
Instance type
-
c5ad.large, c5ad.xlarge, or c5ad.2xlarge
-
-
Key pair
Choose your preferred key pair
-
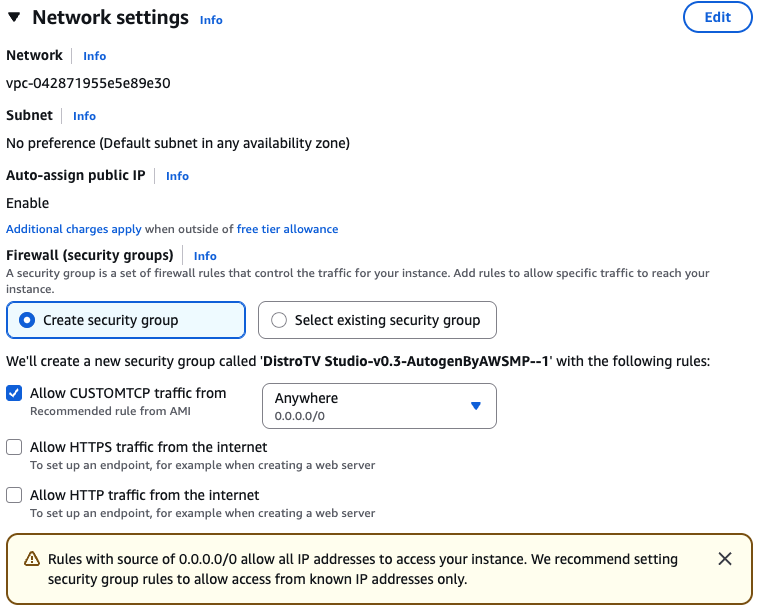
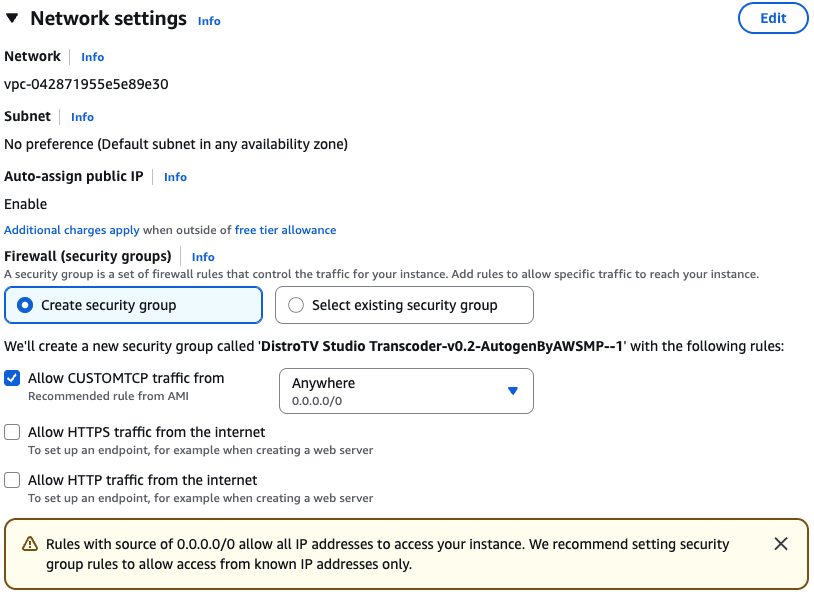
Network settings
-
Check the following:
-
Allow CUSTOMTCP traffic from (Anywhere)
-
-
-
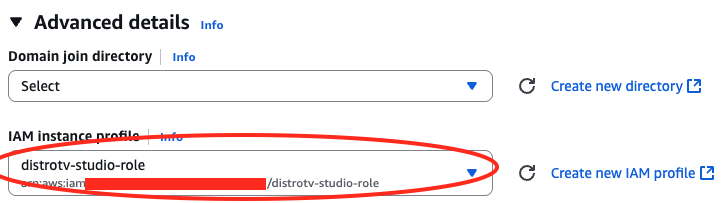
Under the “Advanced details” box
-
IAM instance profile
-
Select the role you created earlier (distrotv-studio-role if you followed the naming convention in the Chapter 2)
-
-
-
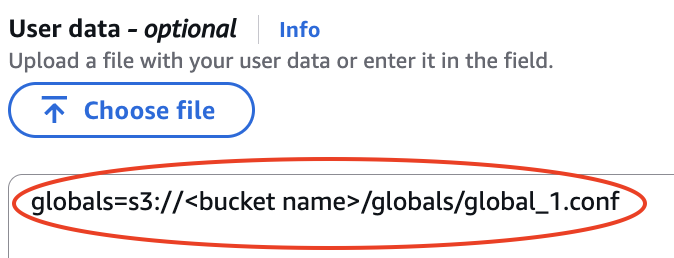
“User data - optional” (near the bottom of the options)
-
Add the following line being sure to reference your S3 file path or publicly accessible URL that stores the global conf file(s)
-
-
Click on “Launch instance” button
-
After waiting 2-3 minutes, validate the machine is up and running by connecting to the API
-
Open a browser and go to your EC2 instance’s API log, being sure to replace your-instance-public-IPv4 with your newly launched EC2 instance’s Public IPv4 address: http://your-instance-public-IPv4:34123/?version
-
Ingest Content
Create Metadata File(s)
Download the sample content metadata Excel template found below. Populate the spreadsheet with your own content details and save as a TSV file with the name category_name.tsv where category_name is the name of your category/grouping of content. If you have a particular grouping of content, such as a playlist, collection of movies, a certain series, etc. that you wish to be tagged together as a certain category then you are advised to include all of them in the same metadata file.
-
HINT: Every piece content referenced in this metadata file will be tagged with the category name upon ingest.
Within the Excel template, you will see different columns for various metadata. Some are required while others are optional. For each piece of content, a Global Unique ID (GUID), content title, and the link to or file path of the video file associated are required. Things such as content description, genre, publish date,
etc. are optional – but all info should be shared in a Metadata Mapping spreadsheet.
Reference the table below to see which metadata columns are required:
| Metadata Column Name | Field Description | Requirement |
|---|---|---|
| #guid | Global Unique ID | Required |
| title | Title of the content | Required |
| description | Description of the content | Optional |
| pub_date | Publish date of the content in YYYY-MM-DD format | Optional |
| video_path | S3 file path of the video file, or publicly readable URL | Required |
| thumbnail_path | S3 file path of the video content thumbnail in 16:9 aspect ratio, or publicly readable URL | Optional |
| rating | Rating of the content | Optional |
| audio_tracks | S3 file paths of the audio track files, or publicly readable URL as a CSV for content with multiple audio tracks | Optional |
| subtitle_tracks | S3 file paths of the subtitle track files, or publicly readable URL as a CSV for multiple subtitle tracks | Optional |
| cuepoints | Timestamps for the content’s ad break timings as a CSV for multiple timestamps | Optional |
-
You can create as many category_name.tsv metadata files as needed to group your content accordingly.
-
You can ingest multiple categories of metadata files in your preramp configuration file as covered in the next section.
The same video can exist in multiple categories and will be tagged accordingly with the correct flags enabled in your preramp configuration file as discussed in the next sction.
-
-
Upload your category_name.tsv file(s) to a publicly accessible location, we recommend the S3 bucket you just created for this purpose in the content folder.
-
If you kept the default filepath from the sample global conf file, the file path would be s3://bucket name/content/category_name.tsv
-
Create a Preramp Conf File
-
Create a channel_preramp conf file by downloading the sample preramp conf file here being sure to edit and replace HTTPS URL or S3 FILE PATH TO category_name.tsv with your S3 file path or publicly accessible file URL:
https://docs.distro.tv/samples/channel-builder/meta/channels/yourchannelname_preramp.conf
-
The preramp conf file can be thought of as two sections.
-
Within [General] is where you can configure different ingest settings
-
| Flag | Description | Values |
|---|---|---|
| cid | This channel ID will place all related transcoded-content under a parent folder named | Only positive integers are allowed. |
| parser | Set the content parser based on your input source. You can select from one of our existing mRSS feed parsers, our existing TSV parser (pt), or upload your own. | A name of a parser. Use pt if ingesting from the TSV content metadata templates. |
| freq | Cronjob-like string to sets the frequency for how often DistroTV Studio will scan the category source(s) for new content. | ex. 17 10 * * 0 |
| maxitems | Sets the maximum amount of items to import per category each time the ingest is ran. Setting this value to 0 indicates no limit and will ingest all items found in each category feed. | Only 0, or positive integers are allowed. |
| uniquetitle |
Enabling Unique Titles ensures that items with the same title, which exist across multiple categories, will only be ingested once. This helps avoid duplicating videos and saves memory storage by preventing the transcoding of the same video multiple times. If this option is disabled, the system will check for duplicates using the GUID instead of the titles. Recommended to keep this enabled for non-advanced users. |
"Enabled": "1", "Disabled": "0" |
| deleted |
Enabling Clean Up Categories ensures that the system checks whether items still exist in their assigned category source feed(s) each time it scans for new content. If an item is no longer present in a source feed, its associated category label(s) will be removed from the database. Recommended to keep this enabled for non-advanced users. |
"Enabled": "1", "Disabled": "0" |
| ccount | Sets the number of categories to import. | Only positive integers are allowed. |
-
The [Category#] section dictates the number of category metadata files you ingest.
-
As you introduce multiple categories, you will need to update your conf file accordingly by adding more to the conf file in the following manner
-
Note how the ccount flag is updated accordingly with the number of [CategoryN]
-
You can continue adding more [CategoryN] and its associated name and url as needed
-
-
-
Optionally, you can also add a watermark to burn-in to your videos by adding additional conf file flags
| Flag | Description | Values |
|---|---|---|
| watermark | If you wish you burn in a watermark on each of your videos, input watermark image URL or S3 file path. Images should be png, jpeg, or jpg. Ensure the URL is publicly readable or your instance has permissions for the S3 file path. | A URL or S3 file path to a png, jpeg, or jpg file. |
| wm_transp | Sets the transparency of the watermark. 0% being fully transparent and 100% being fully opaque. Ex. 0.7 means the watermark will be set to 70% opacity. | Float between 0.0 and 1.0 |
| wm_scale | Sets the size scaling of the watermark relative to the original video. Ex. .15 means the watermark will be scaled to a 15% of the video's resolution. | Float between 0.0 and 1.0 |
| wm_pos |
Sets the position of where the watermark will be burned in relative to the original video as an X:Y pixel coordinate. With x='0':y='0' being the top left. You can use 'W' and 'H' to reference the original video's Width and Height respectively, and 'w' and 'h' to reference the watermark's width and height respectively. Some examples:
|
See examples in the description |
The following preramp conf file would burn in a watermark at 70% opacity (wm_transp=0.7), 15% scale of the source video (wm_scale=0.15), in the top left corner with padding equal to 1% of the source video’s Width and Height (wm_pos=x='0.01*W':y='0.01*H').
-
Save as yourchannelname_preramp.conf, replacing yourchannelname with the channel name of your choice.
-
HINT: Preramp files must have the _preramp.conf suffix in the file name.
-
-
Upload this file to your /channels/ folder inside the path defined in the s3_meta folder.
-
If you kept the default filepath from the sample global conf file, the file directory path would be
s3://bucket name/meta/channels/
-
-
After uploading, you can wait 2-3 minutes to see if the channel_preramp conf file was picked up by the machine by checking the watchdog API at:
http://your-instance-public-IPv4:34123/?cmd=getlog&channel=watchdog&grep=
Launch a DistroTV Studio Transcoder Image
-
Navigate to AWS EC2 service
-
Navigate to “AMI Catalog” menu item under the “Images” section on the left menu
-
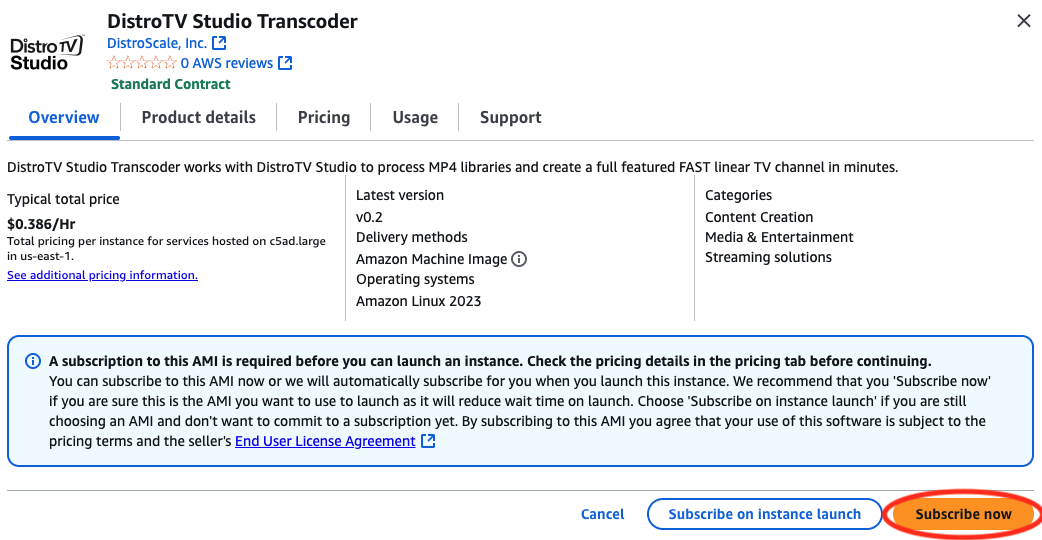
Navigate to “AWS Marketplace AMIs” and search for “DistroTV Studio Transcoder”
-
Select the DistroTV Studio Transcoder image and click on “Subscribe now”
-
After subscribing, you click on “Launch Instance with AMI”
Name – to your liking
-
Instance type
-
c5ad.large, c5ad.xlarge, or c5ad.2xlarge
-
-
Key pair
Choose your preferred key pair
-
Network settings
-
Check the following:
-
Allow CUSTOMTCP traffic from (Anywhere)
-
-
-
Under the “Advanced details” box
-
IAM instance profile
-
Select the role you created earlier (distrotv-studio-role if you followed the naming convention in the Chapter 2)
-
-
-
“User data - optional” (near the bottom of the options)
-
Add the following line being sure to reference your S3 file path or publicly accessible URL that stores the global conf file(s)
-
-
Click on “Launch instance” button
-
Once the DistroTV Studio Transcoder AMI is launched, after 2-3 minutes, it will pick up the videos found in your /transcode/new/ folder
-
You can view the status of the database by accessing the API at
http://IPv4_ADDRESS_OF_YOUR_DISTROTV_STUDIO_MACHINE:34123/?cmd=dblist-
HINT: IPv4_ADDRESS_OF_YOUR_DISTROTV_STUDIO_MACHINE should be your DistroTV Studio image IP address
-
Create Channel Schedule
Create a Schedule File
Scheduling: The Order in Which Content is Played
There are several ways in which we can build a channel, and the differences are in how we organize/ select content to be played, as well as the timings in which ad breaks are stitched.
Read the table below to see which schedule type you’re interested in creating. The schedule type you choose will dictate which flags are needed in your channel’s conf file.
| Schedule Type | Organization Type | Ad Break Stitch Style |
|---|---|---|
| pgen (Time Based) (Ads at regularly timed intervals) | Time based, based on specified start time and end time blocks | Requires cadence and length attributes to be defined in the channel conf file. Inserts ad breaks based on the specified cadence and filler length in the conf file. |
| lgen (Playlist Based)(Ads at regularly timed intervals) | Playlist based, does not adhere to any time schedule. Simply plays out what is in the schedule based on specified order | Requires cadence and length attributes to be defined in the channel conf file. Inserts ad breaks based on the specified cadence and filler length in the conf file. |
| atgen (Time Based)(Ads every X videos intervals) | Time based, based on specified start time and end time blocks | Requires every attribute to be defined in the channel conf file. Inserts ad breaks after every X videos specified in the conf file. It plays the filler file for the entire duration |
| agen (Playlist Based)(Ads every X videos intervals) | Playlist based, does not adhere to any time schedule. Simply plays out what is in the schedule based on specified order | Requires every attribute to be defined in the channel conf file. Inserts ad breaks after every X videos specified in the conf file. It plays the filler file for the entire duration |
| cgen (Time & Playlist Based support)(Ads at pre-defined timings) | Supports both time based and playlist based. | Requires cpoints attribute to be defined in the channel conf file. Inserts ad breaks at the timings specified by the cuepoints in the database for the content. Rounded UP to the nearest TS file. It plays the filler file for the entire duration. |
Schedule Type Samples
Below are samples of the different schedule formats. You will notice that all of them have a similar header line which dictates the schedule start time, the rebuild cycle increment (length in hours), and the playback window duration (length in hours) respectively.
Time Based Schedule
Time based schedules will play out content according to start and end time.
Schedule Header Line Fornat
#YYYY-MM-DD HH:MM:SS rebuild cycle increment length in hours
playback window length in hours
Schedule Body Format
start time end time category
name/guid:video_guid/title:video_title (can be a CSV for
multiple)
Playlist Based Schedule
Playlist based schedules will play out content based on the specified order.
Schedule Header Line Fornat
#YYYY-MM-DD HH:MM:SS rebuild cycle increment length in hours
playback window length in hours
Schedule Body Format
start time end time category
cat:category_name/guid:video_guid/title:video_title
Create your schedule based on either a time-based or playlist-based approach following the sample formats above. Be sure to reference your own category_name(s), video_guid(s), and video_title(s) as needed.
The cadence in which the ads will be stitched is dictated in the channel configuration file and will be discussed in a later section.
Once you create your schedule file, save it with the name of your liking with a .tsv file extension.
Create yourchannelname Folder
-
Navigate to your S3 bucket /meta/schedule folder
-
Click on “Create folder” button
-
Under “Folder” box “Folder name” section, name this channel accordingly
-
If you kept the default filepath from the sample global conf file, the file directory path would be
s3://bucket name/meta/schedule/yourchannelname
-
-
Click on “Create folder” button
Upload Your Schedule
-
Navigate to the yourchannelname folder you just created under
s3://bucket name/meta/schedule/yourchannelname/ -
Upload the schedule TSV file you created to this folder
Launch Your Channel
-
Create a channel conf file by downloading the sample channel conf file below here:
https://docs.distro.tv/samples/channel-builder/meta/channels/yourchannelname.conf
-
This channel conf file controls different channel parameters such as ad marker cadence, stream quality variants, ad filler videos, and more.
-
Like the preramp file, the channel conf file is divided into 3 sections: [General], [Variants], and [Fillers]
-
Within [General] is where you will adjust much of the channel’s behavior with the following flags:
-
| Flag | Description | Value |
|---|---|---|
| playlist | Must be set. Indicates to DistroTV Studio that this is a channel conf file. | 1 |
| freq | Cronjob-like string to sets the frequency for how often DistroTV Studio will rebuild and increment the schedule file(s). | ex. 17 10 * * 0 |
| cid | This channel ID will place all related transcoded-content under a parent folder named | Only positive integers are allowed. |
| cpoints |
When Enabled, ad breaks will be inserted based on the given cuepoint timestamps associated with each video in your library. Only enable this is you have cuepoint timestamp data for your videos. Cannot be used together with the every flag. |
"Enabled": "1", "Disabled": "0" |
| cadence |
Determines how often an ad break will be inserted on a time-based interval. An ad break will be inserted after the specified number of seconds have elapsed since the previous ad break (or the start of the schedule). Must be paired with length flag. Cannot be used together with the every flag. |
Only positive integers are allowed. |
| length |
Determines the length/duration of your ad breaks in seconds. Must be paired with cadence flag. Cannot be used together with the every flag. |
Only positive integers are allowed. |
| every |
Determines how often an ad break will be inserted on a per-X-videos interval. An ad break will be inserted after the specified amount of videos air. The ad break will select and playout for the duration of one of your [Fillers]. Cannot be used together with cpoints, cadence, or length flags. |
Only positive integers are allowed. |
| usedbcat |
When Enabled, the schedule builder will search the database using the category column rather than the guid prefix. Recommended to keep this enabled for non-advanced users. |
"Enabled": "1", "Disabled": "0" |
Additionally, there are more advanced flags to use:
| Flag | Description | Value |
|---|---|---|
| vcount |
Lists the number of variants in the stream. Recommended to keep this default value for non-advanced users. |
Leave as 3 |
| awsparams |
These params are used when running aws s3 cp command to upload the m3u8s to s3. Recommended to keep this default value for non-advanced users. |
--acl public-read --recursive --cache-control max-age=3 |
| abumper_before |
When Enabled, the specified ad bumper will be played before cutting to an ad break. Must be used together with abumper. |
"Enabled": "1", "Disabled": "0" |
| abumper_after |
When Enabled, the specified ad bumper will be played after returning from an ad break. Must be used together with abumper. |
"Enabled": "1", "Disabled": "0" |
| abumper |
Source HTTPS link to the folder that holds your ad bumper. Must be used together with abumper_len. |
URL to the folder that contains
your ad bumper video m3u8. Ex. https://your-s3-bucket.com/vid/cid/vid/adbumper |
| abumper_len |
Specifies the duration of your ad bumper in seconds. Must be used together with abumper. |
Only positive integers are allowed. |
| cbumper |
When present in the conf file, the channel will insert a content bumper before every video. Must be used together with cbumper_len. |
URL to the folder that contains
your content bumper video m3u8. Ex. https://your-s3-bucket.com/vid/cid/vid/cbumper |
| cbumper_len |
Specifies the duration of your content bumper in seconds. Must be used together with cbumper. |
Only positive integers are allowed. |
| sqlsort |
Allows the user to adjust how content is prioritized in the scheduling mechanism. The value input will be added as a string in the SQL query after 'ORDER BY '. Can be used if you wish to organize your schedule generation in a specific way. |
A valid SQL statement proceeding ‘ORDER BY ‘. For example, you can input 'id desc' if you wish you have your schedule created prioritizing the most recent content in a category. |
| loopforever |
When Enabled, the generated schedule will loop and playout indefinitely until a new schedule is uploaded. Recommended to keep this disabled for non-advanced users. If you choose to enable this, ensure that the cronjob set in the freq flag is an invalid cronjob time that never runs. |
"Enabled": "1", "Disabled": "0" |
| ts_prefix |
Adds a prefix to the TS files so instead of a relative domain filepath, you can input a new domain file path prefix to the TS files within the m3u8 playlists. Recommended to leave this disabled for non-advanced users. |
A valid CDN domain to route your TS files through |
In the [Fillers] section is where you will point to the video(s) you would like to use as ad break fillers, that is, the content that will be aired during ad breaks. It acts as a pool of possible videos that can air during the ad breaks, like a Category during content ingest. The count flag denotes the number of filler videos you have, and the N integer points to the associated URL. It should be noted that DistroTV Studio will only read the first N number of filler URLs denoted by count. For example, if you have count=3 but 5 filler URLs, it will only read the first 3.
When using cpoints=1 or the every=X flag to insert ad breaks, the entire duration of the selected filler will playout and used as the duration of the ad break. Whereas with cadence and length, the length flag is what dictates the length of your ad break and will concatenate or crop your filler(s) as needed to reach the assigned ad duration.
Sample channel conf file using every=X ad break pattern
Sample channel conf file using cadence & length ad break pattern
Sample channel conf file with ad bumper and content bumpers and sqlsort set to prioritize newly ingested content
It is highly recommended to leave the [Variants] section untouched.
-
Once you create your channel conf file, save as yourchannelname.conf
-
Check to ensure the sample videos have finished transcoding before proceeding with the next step
-
You can view the status of the database by accessing the API at
http://your-instance-public-IPv4:34123/?cmd=dblist-
HINT: your-instance-public-IPv4 should be your DistroTV Studio image IP address
-
-
Wait for the “status” of both the videos to be “complete” before proceeding with the next step
-
-
Inside the /meta/channels/ folder, upload the channel conf file you created yourchannelname.conf
-
After uploading, you can wait a few minutes to see if the channel was picked up by the machine by checking the watchdog API at:
http://your-instance-public-IPv4:34123/?cmd=getlog&channel=watchdog&grep= -
The initial channel EPG building from the provided schedule will begin progressing. You can see this occur within the channel API at:
http://your-instance-public-IPv4:34123/?cmd=getlog&channel=yourchannelname&grep= -
If the schedule was properly picked up, it will say the below (or something similar)
-
The master playlist building complete message marks the successful generation of the schedule and the EPG has been built.
-
Once the EPG has been built, you can check the EPG in the s3_meta folder. If you kept the default filepath from the sample global conf file, the file directory path would be
-
s3://bucket name/meta/epg/yourchannelname/datetimestamp/
-
-
You can also check to see if files have begun to populate in your s3_output folder. If you kept the default filepath from the sample global conf file, the file directory path would be s3://bucket name/strm/channels/yourchannelname/
-
When the built schedule is active, you will be able to view your channel at https://bucket name.s3.region.amazonaws.com/strm/channels/yourchannelname/master.m3u8
-
Replace bucket name with your bucket name
-
Replace region with your S3 bucket region
-
Replace yourchannelname with your channel name
-
-
Congratulations on launching your first channel!
○ NOTE: For production streaming, distribute your content through a Content Delivery Network (CDN) like Amazon CloudFront to improve viewer performance and optimize costs.
After all chapters, your S3 bucket should have the following structure: